4.2 Graph Editor
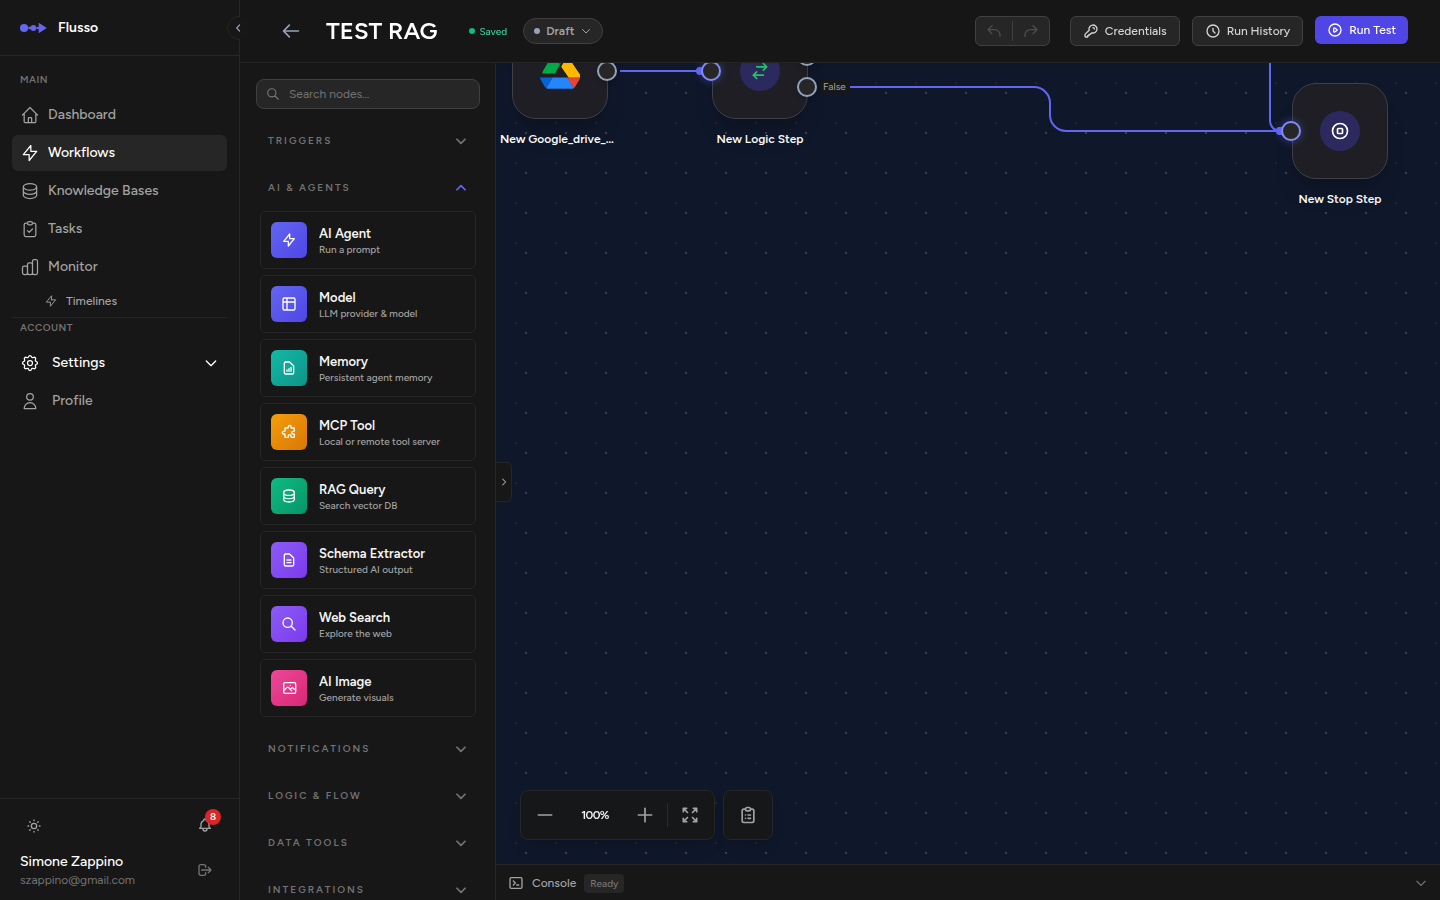
The Graph Editor is a free-form canvas where workflow nodes are placed visually and connected with edges (arrows). It supports parallel execution, complex AI agent configurations, and multi-path routing that would be difficult to represent as a simple list.
When to Use the Graph Editor
Choose the Graph Editor when your workflow needs:
- Parallel branches — execute multiple paths simultaneously and merge results.
- AI agent configuration nodes — wire a Model Config, Memory, or MCP Tool node directly to an Agent node.
- Complex routing — multiple switch branches connecting to different sub-graphs.
- Visual clarity — when a vertical list makes the flow hard to follow.
Navigating the Canvas
| Action | How to do it |
|---|---|
| Pan | Click and drag on empty canvas space. |
| Zoom in/out | Scroll the mouse wheel, or use the +/- buttons in the mini-map. |
| Fit all nodes | Press the "fit view" button in the mini-map controls. |
| Select a node | Click on any node card. |
| Move a node | Drag the node card. Nodes snap to a 20px grid for clean alignment. |
| Select multiple | Click and drag on empty space to draw a selection rectangle. |
The canvas background displays a double-layer dot grid pattern that provides visual reference points for aligning nodes and gauging distances at different zoom levels.
Adding Nodes to the Canvas
There are three ways to add a node:
- Drag from palette — drag any node icon from the left palette and drop it onto the canvas at the desired position. The palette displays compact icon tiles in a 3-column grid, grouped by category with collapsible headers.
- Click in palette — clicking a node icon in the palette places it in the centre of the visible canvas area.
- Right-click on canvas — a context menu appears with an option to add a node from a quick picker.
Connecting Nodes (Drawing Edges)
Nodes are connected by edges (arrows). An edge represents the flow of execution — data passes along an edge from the source node to the target node.
-
Hover over the source node Small circular port handles appear on the right (output) and left (input) edges of the node card.
-
Drag from an output port Click and drag from the right port of the source node.
-
Drop onto the target node's input port Release the mouse on the left port of the target node. An arrow is drawn connecting the two nodes.
To delete an edge, click on it to select it, then press Delete or Backspace.
Node Appearance
Each node on the canvas is rendered as a card with square corners. On the left edge of the card is a coloured icon strip displaying a white icon that represents the node type. To the right of the icon strip, the node name and a short preview of its configuration are shown.

Agent Node Configuration
Agent nodes are configured entirely via the node editor panel. Double-click an Agent node (or right-click and choose Edit) to open the panel, where you can set the AI model, memory backend, connected tools, prompt, and all other agent parameters.
Configuration Nodes
Configuration nodes are special nodes that do not execute any action — they carry configuration data to the nodes they connect to. They appear as smaller, distinctively styled cards on the canvas and are found in the AI & Agents category of the node palette.
| Node | Connects to | Configures |
|---|---|---|
| Model Config | Agent node | Provider, model name, temperature, max tokens. |
| Memory | Agent node | Memory Provider, scope, namespace, max history turns. |
| MCP Tool | Agent node | External tool via stdio subprocess or SSE HTTP endpoint. |
Parallel Execution
To run steps simultaneously, use the Parallel node. Connect its output to multiple nodes — they will all start at the same time. After all branches complete, the workflow continues to whatever node is connected after the parallel branches merge.
{{ parallel_step.output.branch_name }} after the merge.
Configuring Nodes in Graph Mode
Double-click any node card on the canvas, or click the edit icon that appears when you hover over a node, to open the configuration drawer on the right. The drawer works identically to the node editor panel — all fields and variable references behave the same way.
Context Menu
Right-clicking anywhere on the canvas surface, on a node card, or on an edge opens a context menu tailored to the target element.
Right-click on a node
| Option | Action |
|---|---|
| Edit | Opens the configuration drawer for the node. |
| Copy | Copies the node to the canvas clipboard. |
| Duplicate | Creates a copy of the node placed nearby on the canvas. |
| Delete | Removes the node and all its connected edges. |
Right-click on an edge (connection)
| Option | Action |
|---|---|
| Delete Connection | Removes the selected edge without affecting the connected nodes. |
Right-click on the canvas
| Option | Action |
|---|---|
| Paste | Pastes the last copied node onto the canvas at the cursor position. |
| Fit View | Zooms and pans the canvas to fit all nodes in the visible area. |
| Auto Layout | Automatically arranges all nodes in a left-to-right flow layout. |
| Undo | Reverts the last canvas change (add, move, delete, connect). |
| Redo | Re-applies the last undone change. |
Mini-Map
A small map in the bottom-right corner shows the full layout of the canvas. Nodes appear as small coloured rectangles. Drag inside the mini-map to pan the main canvas quickly, or click anywhere in the mini-map to jump to that position.
Graph Editor Tips
- Use consistent left-to-right layouts — it makes the flow easier to read, especially when printing to PDF.
- Group related nodes visually by placing them close together.
- For complex AI agent setups, double-click the Agent node to open its editor panel and configure model, memory, and tools in one place.
- Save often — the canvas layout is also saved with the workflow.
- Use the mini-map to quickly navigate large canvases with many nodes.