4. Workflows
Workflows are the core building block of Flusso. A workflow is an automated process composed of a trigger and one or more nodes. Each time the trigger fires, Flusso executes the nodes in order, passing data from step to step until the workflow completes or an error occurs.
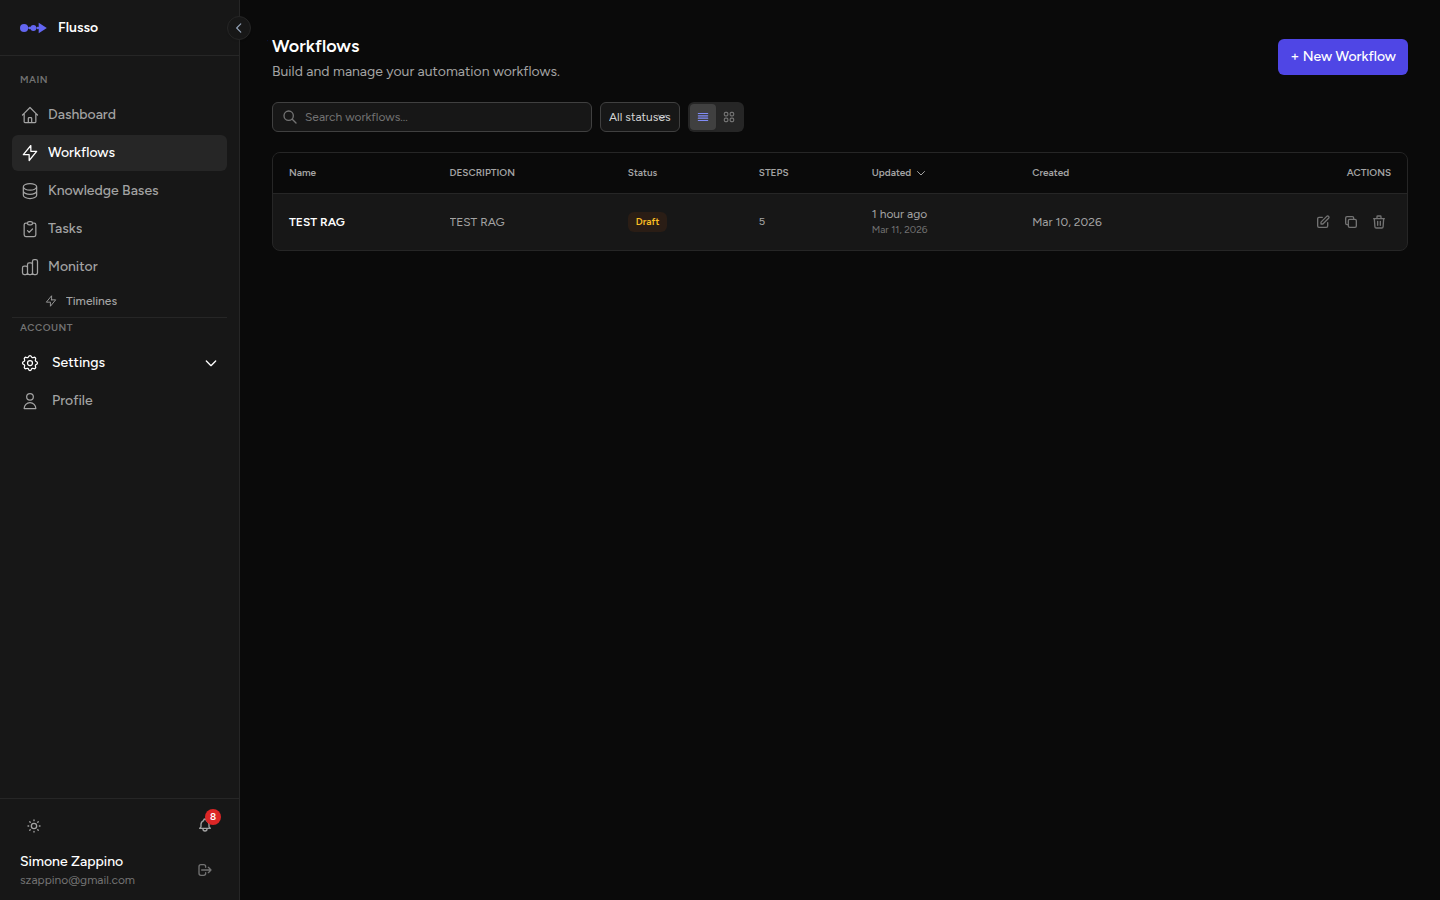
The Workflows Page
The Workflows page (accessible from the sidebar) lists all the workflows in your account. You can switch between a table view (dense, sortable rows) and a grid view (larger cards with more visual context).
Searching & Filtering
- Search bar — filters by workflow name or description as you type.
- Status filter — show All, Active, Draft, or Archived workflows only.
- Sort — click any column header (Name, Status, Steps, Updated) to sort.
Actions on an Existing Workflow
| Action | Description |
|---|---|
| Edit | Opens the workflow editor. Available for any workflow regardless of status. |
| Duplicate | Creates an exact copy of the workflow, including all steps and trigger configuration, with the name prefixed by "Copy of". |
| Delete | Permanently deletes the workflow and all its run history. Requires confirmation. |
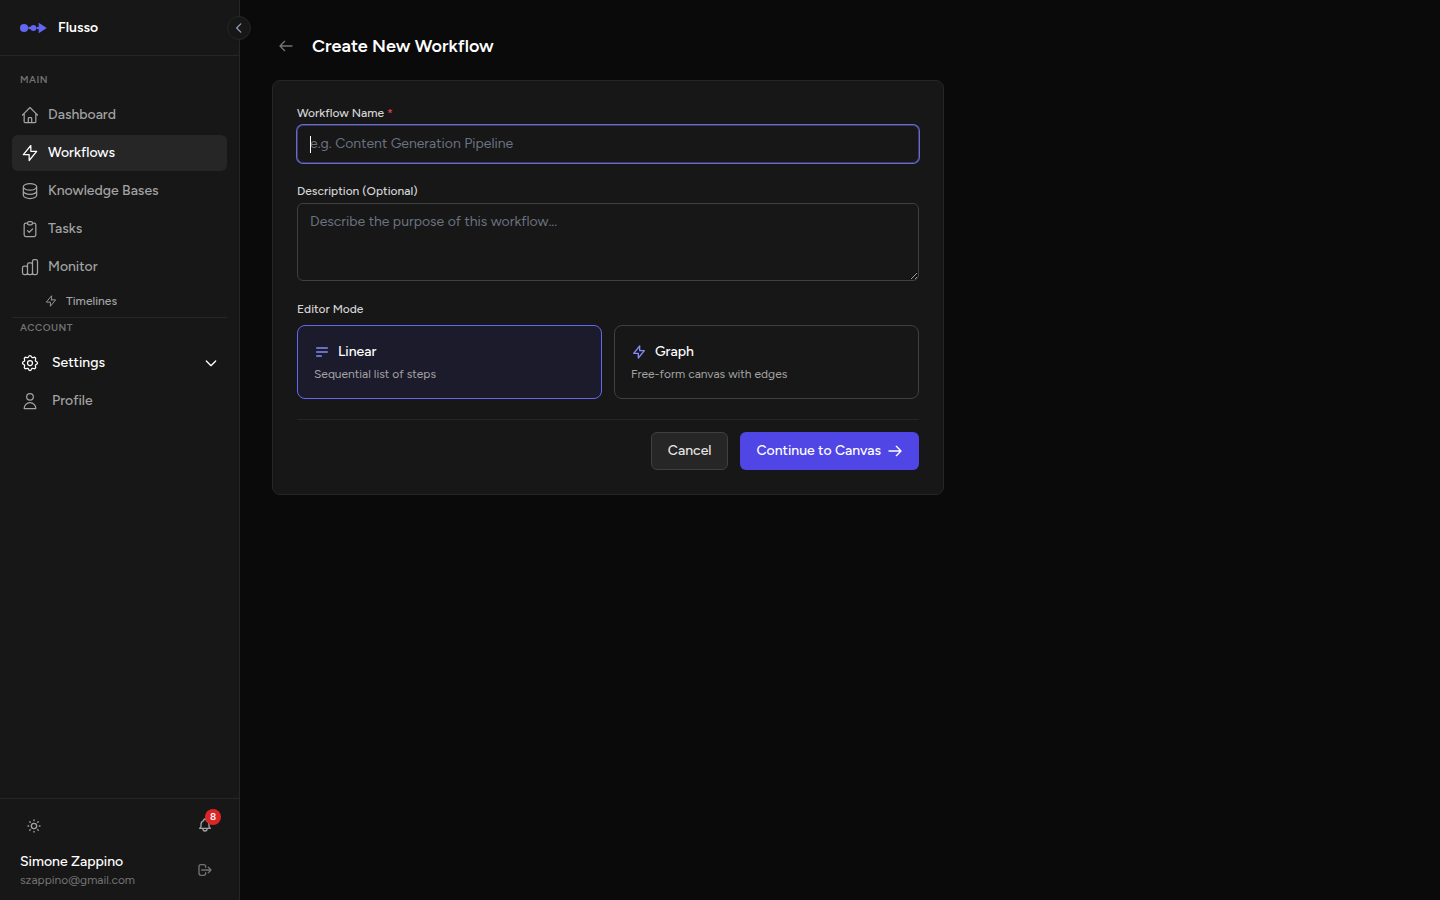
Creating a New Workflow
-
Click "New Workflow" The button appears in the top-right corner of the Workflows page.
-
Enter a name and optional description The name appears in the workflow list, editor header, monitor, and run logs. Choose something descriptive (e.g. "Nightly Report Email", "Support Ticket Triage").
-
Choose an editor mode Select Linear for sequential step-by-step logic, or Graph for a free-form canvas with parallel branches and AI agent wiring. You can not switch editor modes after creation.
-
Click "Create Workflow" The editor opens immediately and you can begin adding nodes.
The Graph Editor
Flusso uses a free-form graph editor where nodes are positioned on a canvas and connected with draggable edges. The editor supports:
- Parallel branches that execute simultaneously.
- AI agents with configurable models, memory, and tools.
- Complex conditional routing with multiple connected switch branches.
- Snap-to-grid node placement for clean layouts.
→ See Graph Editor for the full guide.
Triggers
Every workflow must have exactly one trigger — the event that starts an execution. The trigger is configured in the Trigger block at the top of the editor. Click it to open the trigger configuration drawer.
| Trigger type | How it fires | Typical use |
|---|---|---|
| Manual | Clicking the Run button in the editor or sending a manual API request. | Testing, on-demand tasks. |
| Webhook | An HTTP POST request to the workflow's unique webhook URL. | Receiving data from external services (forms, payment processors, CRMs). |
| Schedule | A cron expression evaluated by the Flusso scheduler. | Nightly reports, hourly sync jobs, recurring reminders. |
| Event | Another workflow emitting a named event via the Emit Event node. | Chained workflows, fan-out patterns. |
| Error | Another workflow failing. Receives the error context automatically. | Error handlers, alerting workflows, automatic recovery. |
| Stripe / GitHub / Shopify | Platform-specific webhooks with signature validation. | E-commerce automations, CI/CD reactions, payment processing. |
| Google Drive Watch / Dropbox Watch / Local File Watch | A new file appears in a monitored folder. | Document processing pipelines, automated ingestion. |
Webhook Trigger Details
When you set the trigger type to Webhook, Flusso generates a unique URL for that workflow:
Any JSON payload sent to this URL will be available inside your workflow as:
Webhook Authentication
You can optionally protect your webhook URL. Configure authentication in the trigger drawer:
- None — the webhook accepts any POST request. Use only in trusted environments.
- Secret Header — the caller must include a specific header with a secret value. Configure the header name and secret in the drawer.
- HMAC Signature — the caller signs the payload with a shared secret. Flusso verifies the signature before executing the workflow.
Schedule Trigger — Cron Syntax
The schedule trigger uses standard 5-part cron syntax:
Run History
Every workflow execution is recorded. To view the history for a specific workflow, click the workflow name in the list, then navigate to the Runs tab. The last 50 runs are shown, sorted from newest to oldest.
Click any run to open the Run Detail view, which shows a full step-by-step trace with input data, output data, duration, and any error messages.