1. Introduction
Flusso is a visual workflow automation platform. It lets you build, run, and monitor automated processes that connect AI models, APIs, file storage, messaging services, and your own business logic — all without writing code.
What is Flusso?
Flusso is a self-hosted automation platform built for teams that need precise control over their data and AI workflows. You design workflows as sequences of connected nodes, where each node performs a specific action: calling an AI model, fetching data from a knowledge base, sending an email, making an HTTP request, and much more.
Workflows can be triggered manually, on a schedule, by an incoming webhook, or by events emitted from other workflows. Results are monitored in real time, and every execution step is logged for inspection.
Workflow — an automated process composed of ordered steps.
Node — a single step in a workflow (e.g. "Call AI", "Send Email", "Check Condition").
Run — a single execution of a workflow, from trigger to completion.
Trigger — the event that starts a workflow (manual click, webhook, schedule, etc.).
Knowledge Base — a searchable vector store that AI nodes can query.
Core Capabilities
Visual Workflow Editor
Build workflows in two editor modes:
- Linear Editor — a vertical step-list ideal for sequential, top-to-bottom logic.
- Graph Editor — a free-form canvas where nodes connect with draggable edges, supporting parallel branches and complex AI agent configurations.
AI Agents
The Agent node lets you integrate large language models (OpenAI, Anthropic Claude, local Ollama models, and more) directly into your workflows. Agents can search the web, query your knowledge bases, call external tools via the Model Context Protocol (MCP), and maintain memory across conversations.
Knowledge Bases
Upload documents (PDF, text) to a Knowledge Base. Flusso indexes them using vector embeddings, allowing the RAG (Retrieval-Augmented Generation) node to perform semantic search and return the most relevant excerpts to feed into your AI agents.
Triggers & Scheduling
Every workflow starts with a trigger. Flusso supports manual triggers, cron-based schedules, incoming webhooks (with optional authentication), and event-based triggers that listen for events emitted by other workflows.
Monitoring & Observability
The Monitor and Timelines pages give you a real-time view of running and recently completed workflows. Every step logs its input, output, duration, and any errors — making it easy to diagnose failures.
Human-in-the-Loop
The Approval and Manual Input nodes pause a workflow and wait for a human response before continuing. Pending tasks are surfaced on the Tasks page for easy action.
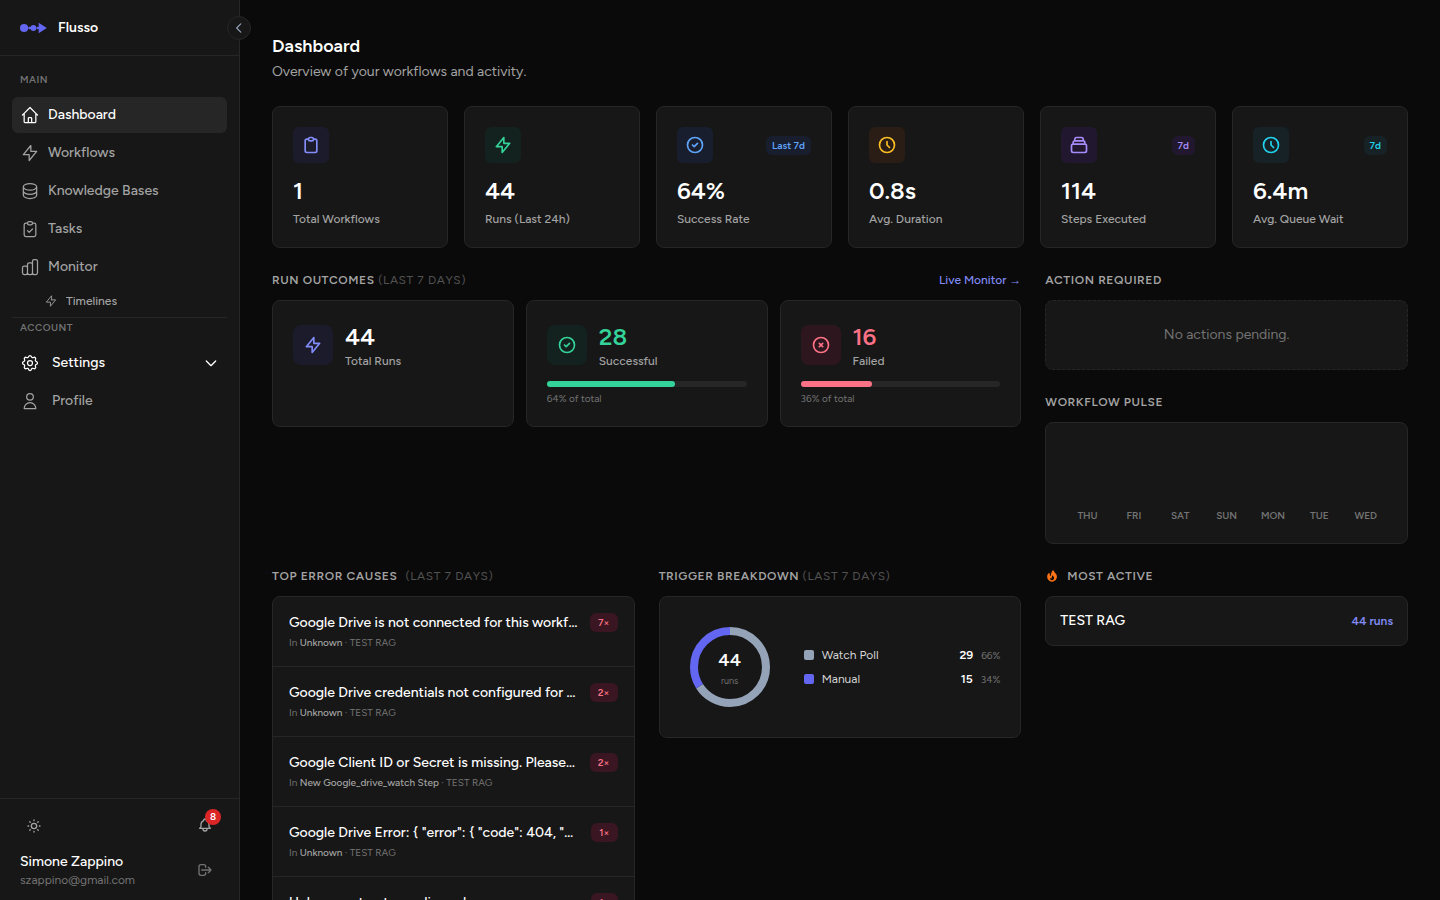
Platform Layout
After logging in, the interface is divided into two areas: the left sidebar for navigation and the main content area for each section.
Sidebar Navigation
| Section | Description |
|---|---|
| Dashboard | Overview stats, recent errors, and activity charts for all your workflows. |
| Workflows | Create, edit, and manage all your automated workflows. |
| Knowledge Bases | Upload and manage document collections for AI-powered search. |
| Tasks | Respond to pending approvals and manual input requests from running workflows. |
| Monitor | Live view of all workflow runs across your account. |
| Timelines | Gantt-style timeline showing step execution durations per workflow. |
| Settings | Configure AI providers, email, integrations, and memory backends. |
Getting Started
Follow these steps to create and run your first workflow:
-
Configure an AI Provider (if using AI nodes) Go to Settings → AI Providers and add your API key for OpenAI, Anthropic, or connect a local Ollama instance. See AI Providers.
-
Create a new Workflow Click Workflows in the sidebar, then the New Workflow button. Give it a name, choose your editor mode (Linear or Graph), and confirm.
-
Add a Trigger Every workflow starts with a trigger. Click the Trigger block at the top of the editor to choose how this workflow will start: manually, on a schedule, or via webhook.
-
Add Nodes Use the sidebar panel to drag or click nodes into your workflow. Configure each node's settings using the configuration drawer that opens on the right.
-
Test your Workflow Click the Run button in the editor header. A test execution will run and display results in the bottom console panel.
-
Activate & Monitor Set the workflow status to Active. Go to the Monitor page to watch live executions in real time.
Variable Syntax
Throughout Flusso, you can reference the output of any previous node using the double-brace syntax. This allows you to pass data from one step to the next dynamically.
The step_key is the unique identifier assigned to each node in your workflow.
Keys are displayed on every step card and can be customised in the step configuration drawer.
You can click on data pills in the output panel to automatically insert the correct syntax into
any configuration field.
Workflow & Run Statuses
Workflow Status
| Status | Meaning |
|---|---|
| Active | The workflow is live and will execute when its trigger fires. |
| Draft | The workflow is being edited and will not respond to triggers. |
| Archived | The workflow is retained for reference but cannot be triggered. |
Run Status
| Status | Meaning |
|---|---|
| Completed | The workflow finished successfully. |
| Failed | An error occurred during execution. Check the run detail for the error message. |
| Running | The workflow is currently executing. |
| Waiting | The workflow is paused, awaiting human approval or input. |
| Queued | The workflow is waiting for a worker to pick it up. |